Rolling a joint is an art form that has been passed down through generations of cannabis enthusiasts. There's something magical about the process of transforming dry herb into a perfectly rolled masterpiece. Whether you're a seasoned smoker or new to the world of cannabis, learning how to roll a joint is a skill that will impress your friends and enhance your smoking experience. In this step-by-step guide, we'll take you on a journey to become a joint-rolling maestro.
Gather Your Supplies
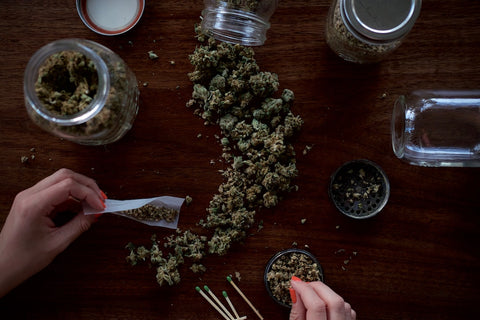
Before diving into the rolling process, it's essential to gather all the necessary supplies. Here's what you'll need:
- A high-quality strain of cannabis
- Rolling papers (choose the size that suits your preference)
- A grinder to break down the herb
- A filter tip (also known as a crutch or roach)
- A small tray or surface to roll on
- A lighter or matches to ignite your creation
Prepare Your Herb
The first step in rolling the perfect joint is preparing your herb. Begin by grinding your cannabis using a grinder. Grinding your herb ensures an even burn and allows for a smoother smoking experience. Once your herb is finely ground, it's time to move on to the rolling process.
The Rolling Technique
Now comes the moment of truth – rolling your joint. Follow these steps to achieve joint-rolling excellence:
Step 1: Create the Crutch
A crutch, also known as a filter tip or roach, is a small piece of cardboard or stiff paper that helps maintain the shape of your joint and prevents bits of herb from being inhaled. Take a small piece of cardboard or a pre-made crutch and fold it into an accordion shape. Place the crutch at one end of your rolling paper, leaving a small space for the herb.
Step 2: Load the Herb
Take your rolling paper and hold it with the adhesive strip facing you. Evenly distribute the ground herb along the center of the paper, leaving some space at both ends. Be careful not to overpack the joint, as this can make it difficult to roll and hinder airflow.
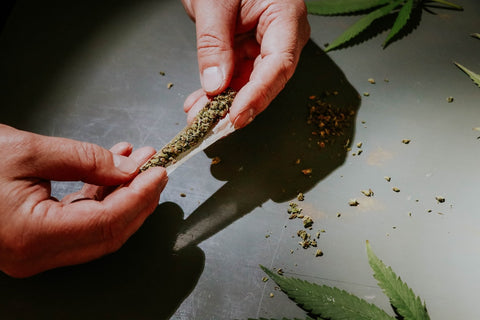
Step 3: Shape and Tuck
With your thumbs and index fingers, gently shape the herb into a cylindrical form. Begin tucking the unglued edge of the rolling paper over the herb, using your thumbs to create a tight roll. Make sure the adhesive strip is on the outside of the joint, as this will be used to seal it.
Step 4: Lick and Seal
Moisten the adhesive strip with your tongue and continue rolling until the joint is fully sealed. Apply gentle pressure to ensure a tight seal. If you're not a fan of licking the adhesive, you can use a small brush or dampen the adhesive with a moist towel.
Step 5: Final Touches
Before lighting up, it's essential to give your joint a few finishing touches. Use your fingers to gently pack the herb down to ensure an even burn. If necessary, twist the end of the joint to keep the herb from falling out. And voila! You've successfully rolled a joint worthy of admiration.
Practice Makes Perfect
Remember, rolling a joint takes practice. Don't be discouraged if your first attempts are less than perfect. The more you roll, the better you'll become. Experiment with different strains, rolling papers, and techniques to find what works best for you. Before you know it, you'll be rolling joints with the finesse of a true cannabis connoisseur.
Share the Experience
Rolling a joint is not just about the end result; it's about the experience and the community it brings together. Share your joint-rolling skills with friends and teach them the art you've mastered. Let the good times roll as you bond over the shared love of cannabis and the satisfaction of enjoying a perfectly rolled joint.
Ignite and Enjoy
Now that you've mastered the art of rolling joints, it's time to light up and savor the fruits of your labor. Find a comfortable spot, gather your friends, and ignite your joint with pride. As the sweet smoke fills the air, let the relaxing and euphoric effects of cannabis transport you to a place of bliss.
So, what are you waiting for? Grab your supplies, perfect your technique, and embark on the journey of becoming a joint-rolling aficionado. The world of cannabis awaits, and with your newfound skills, you'll be rolling in style.
Happy rolling!